

Table of contents
- An Overview of the Family and Consent APIs
- Prerequisites
- Installing and configuring FusionAuth with Docker Compose
- Setting up a FusionAuth API key
- Creating and registering users
- Adding users to a family
- Creating a consent
- Setting up Express
- Building the application
- Creating Express Routes
- The OAuth Callback Route
- The Home Route
- The Change Consent Route
- Testing
- Where to next with Family API and Consents?
In this tutorial, you’ll build a basic Node.js + Express web application that grants conditional access to users in a family structure. Specifically, an adult user will be able to grant access to child users to restricted areas of an application.
The application itself is very simple: It will let a user sign up via FusionAuth, allow them to grant consent for children in their family to access certain features of an application, and allow them to update those consents at any time. With these basics in place, you’ll see how FusionAuth works and how it can extend the application to do whatever you need. You can also skip ahead and view the code. Note that some configuration of FusionAuth is needed, as detailed in this guide, so you will need to complete that before running the code.
You can also use these kickstart files to automatically handle the configuration of FusionAuth. You can find more information regarding kickstart files here.
An Overview of the Family and Consent APIs
You will use three main FusionAuth APIs in this tutorial:
- The Family API lets you create and manage families, and assign users to them.
- The Consent API lets you manage the types of consents available in your application.
- The UserConsent API lets you manage consents for a specific user.
Families are a way to group users into a family and assign the family members roles within that family. There are three main roles: Adult, Teen, and Child.
Consents are a definition of a permission that can be given to a user. They capture metadata about a permission, what it is, and who it can be given to. They can be thought of as templates to describe a consent type.
UserConsents are instances of Consents applied to specific users. When a user is granted a consent, a user-to-consent mapping object is created. That object is the UserConsent. Things like who granted the consent to a user, when it was granted, and if the consent is active or deactivated on that particular user are recorded in UserConsents.
Family groups and roles by themselves don’t automatically confer any access privileges or restrictions to their members. However, by combining the structure and roles from the Family API, the Consent and UserConsent APIs, along with some custom glue logic, a fully-fledged permissions system can be created with FusionAuth.
Prerequisites
This tutorial will explain nearly everything that is used, but expects you to have:
- Basic Node.js knowledge and a Node.js environment set up.
- Preferably basic Express knowledge (or knowledge of a similar web framework, or the middleware concept).
- Docker and Docker Compose set up as you’ll set up FusionAuth using these.
It’ll also help if you know the basics of OAuth or authentication in general.
Installing and configuring FusionAuth with Docker Compose
There are various ways to install FusionAuth depending on your system, but the easiest way is to use Docker and Docker Compose. Instructions are here. Currently, to install and run FusionAuth you would run (again, assuming you have Docker installed) the following commands:
curl -o docker-compose.yml https://raw.githubusercontent.com/FusionAuth/fusionauth-containers/master/docker/fusionauth/docker-compose.yml curl -o .env https://raw.githubusercontent.com/FusionAuth/fusionauth-containers/master/docker/fusionauth/.env docker-compose up
Note that this uses a public .env file containing hard-coded database passwords and is not suitable for production use.
Configuring FusionAuth
FusionAuth should now be running and reachable at http://localhost:9011 if you’ve installed it locally. The first time you visit, you’ll be prompted to set up an admin user and password. Once you’ve done this, you’ll be prompted to complete three more setup steps, as shown below.
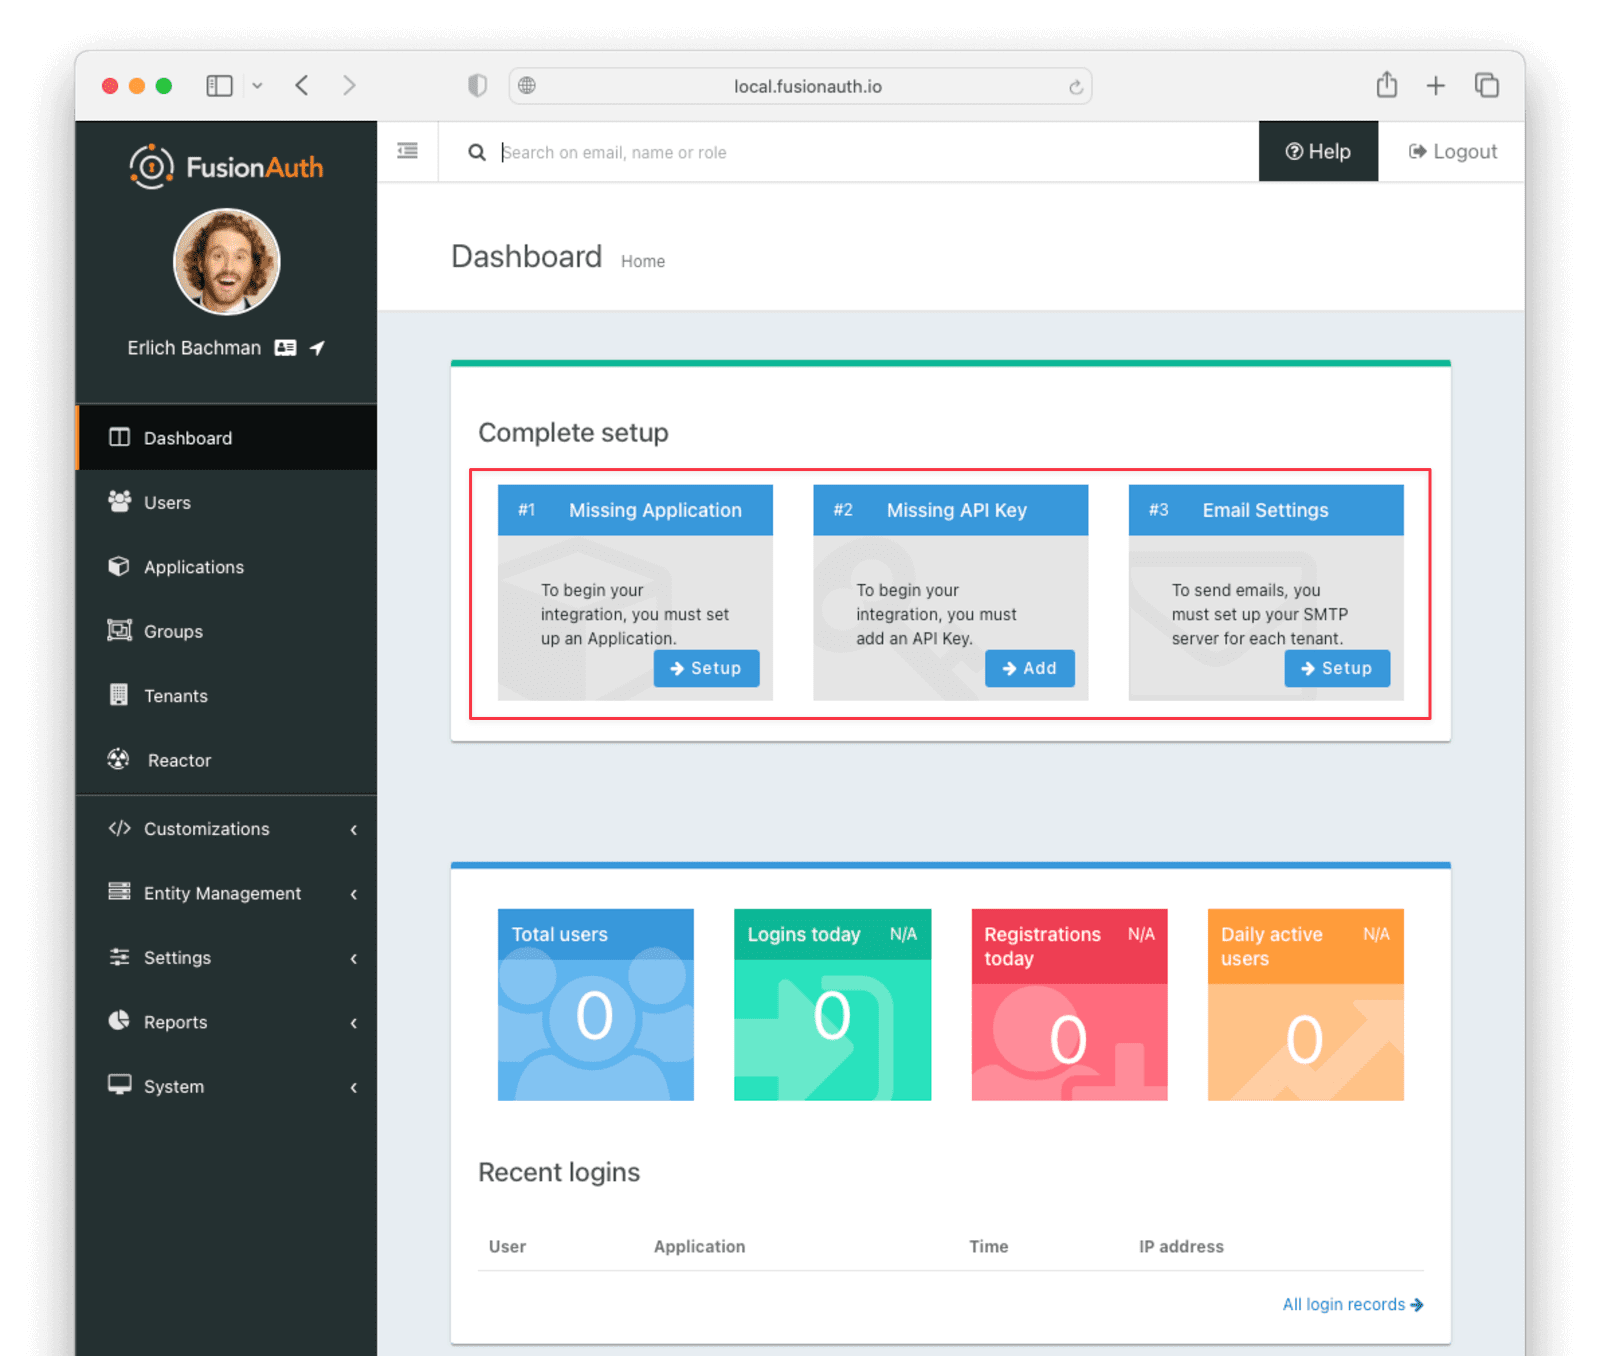
You can skip step #3 in this tutorial, but sending emails (to verify email addresses and do password resets) is a vital part of FusionAuth running in production, so you’ll want to do that when you go live.
Creating an application
Click “Setup” under “Missing Application” and call your new app “Family-Api-App”, or another name of your choice. Click on the “OAuth” tab. It’ll get a “Client Id” and “Client Secret” automatically - save these, as you’ll use them in the code. Later, you’ll set up a Node.js + Express application which will run on http://localhost:3000, so configure the Authorized URLs accordingly. You should add:
http://localhost:3000/oauth-redirectto the “Authorized redirect URLs”.http://localhost:3000to the “Authorized request origin URLs”.http://localhost:3000/logoutto the “Logout URL”.
Make sure that “PKCE” is set to Required. Proof Key for Code Exchange (PKCE) was originally intended for public clients like native mobile or desktop apps that couldn’t safely store a client secret. Now it is recommended even on confidential clients like web apps where the client secret is under secure control to protect against authorization code injection attacks. Your application should look like this:

Click the “Save” button at the top right, for your changes to take effect.
Setting up a FusionAuth API key
Once the user has logged in via the FusionAuth application, you can retrieve their profile, consents, and family information from FusionAuth using the FusionAuth Typescript module, provided with an API key.
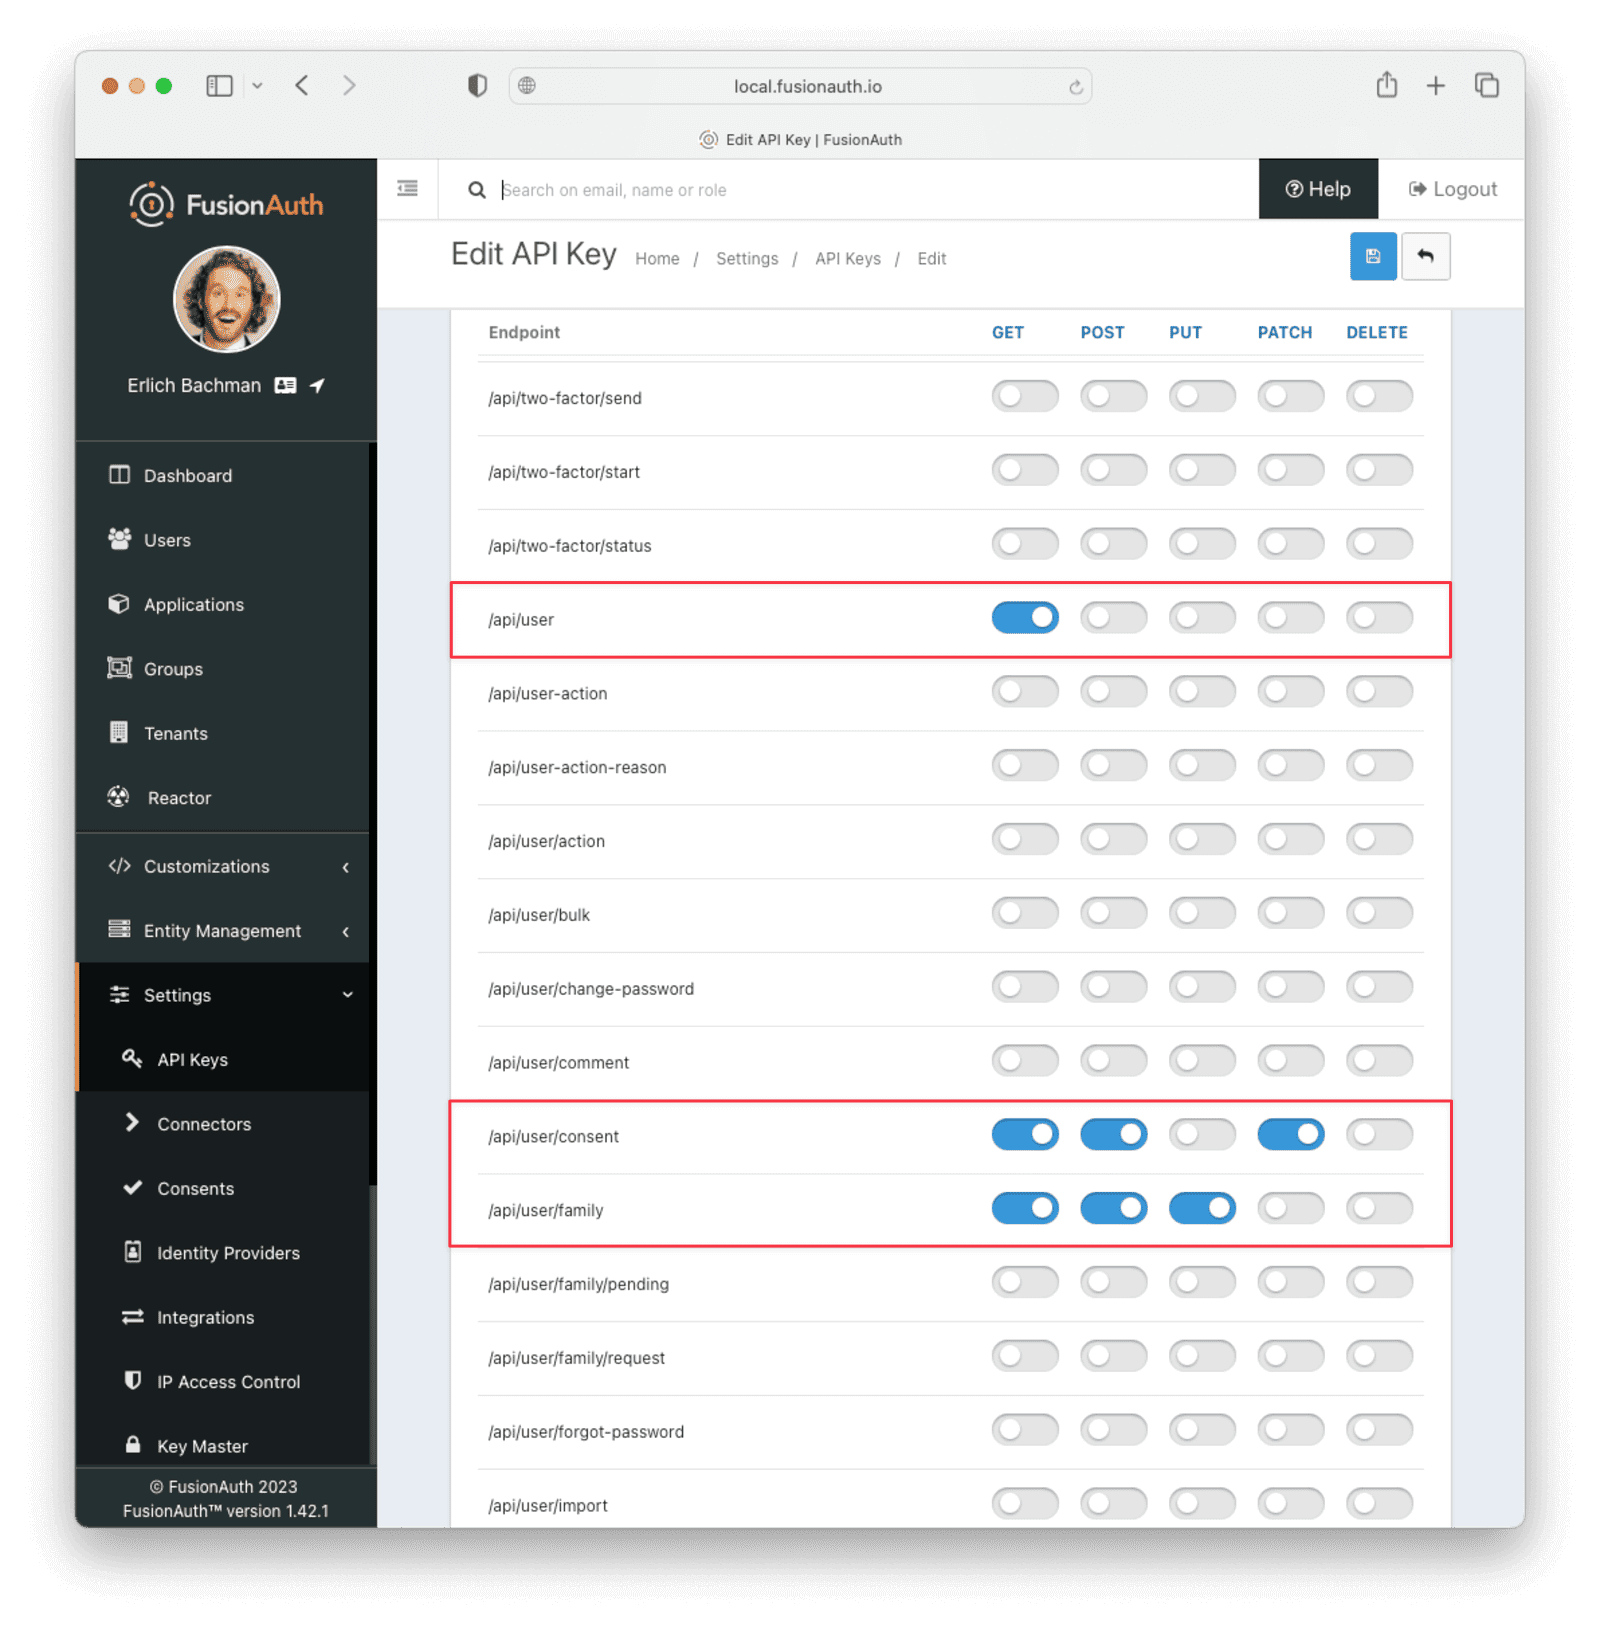
Navigate to “Settings” and then “API Keys”, then add a key. Add a name for the key and take note of the generated key value.
Following the principle of least privilege, you can restrict the permissions for the key. For this app, you only need to enable the GET action for api/user, the GET, POST and PATCH actions for api/user/consent, and the GET, POST, and PUT actions for /api/user/family. This will let the key get basic user information, grant or revoke consents to view the app, create a family, and assign users to it. If you leave the key with no explicitly assigned permissions, it will be an all-powerful key that can control all aspects of your FusionAuth app. You should avoid doing this!
Creating and registering users
The application will have two users: a parent user and a child user. The parent user will be able to grant consent for the child user to access certain features of the application.
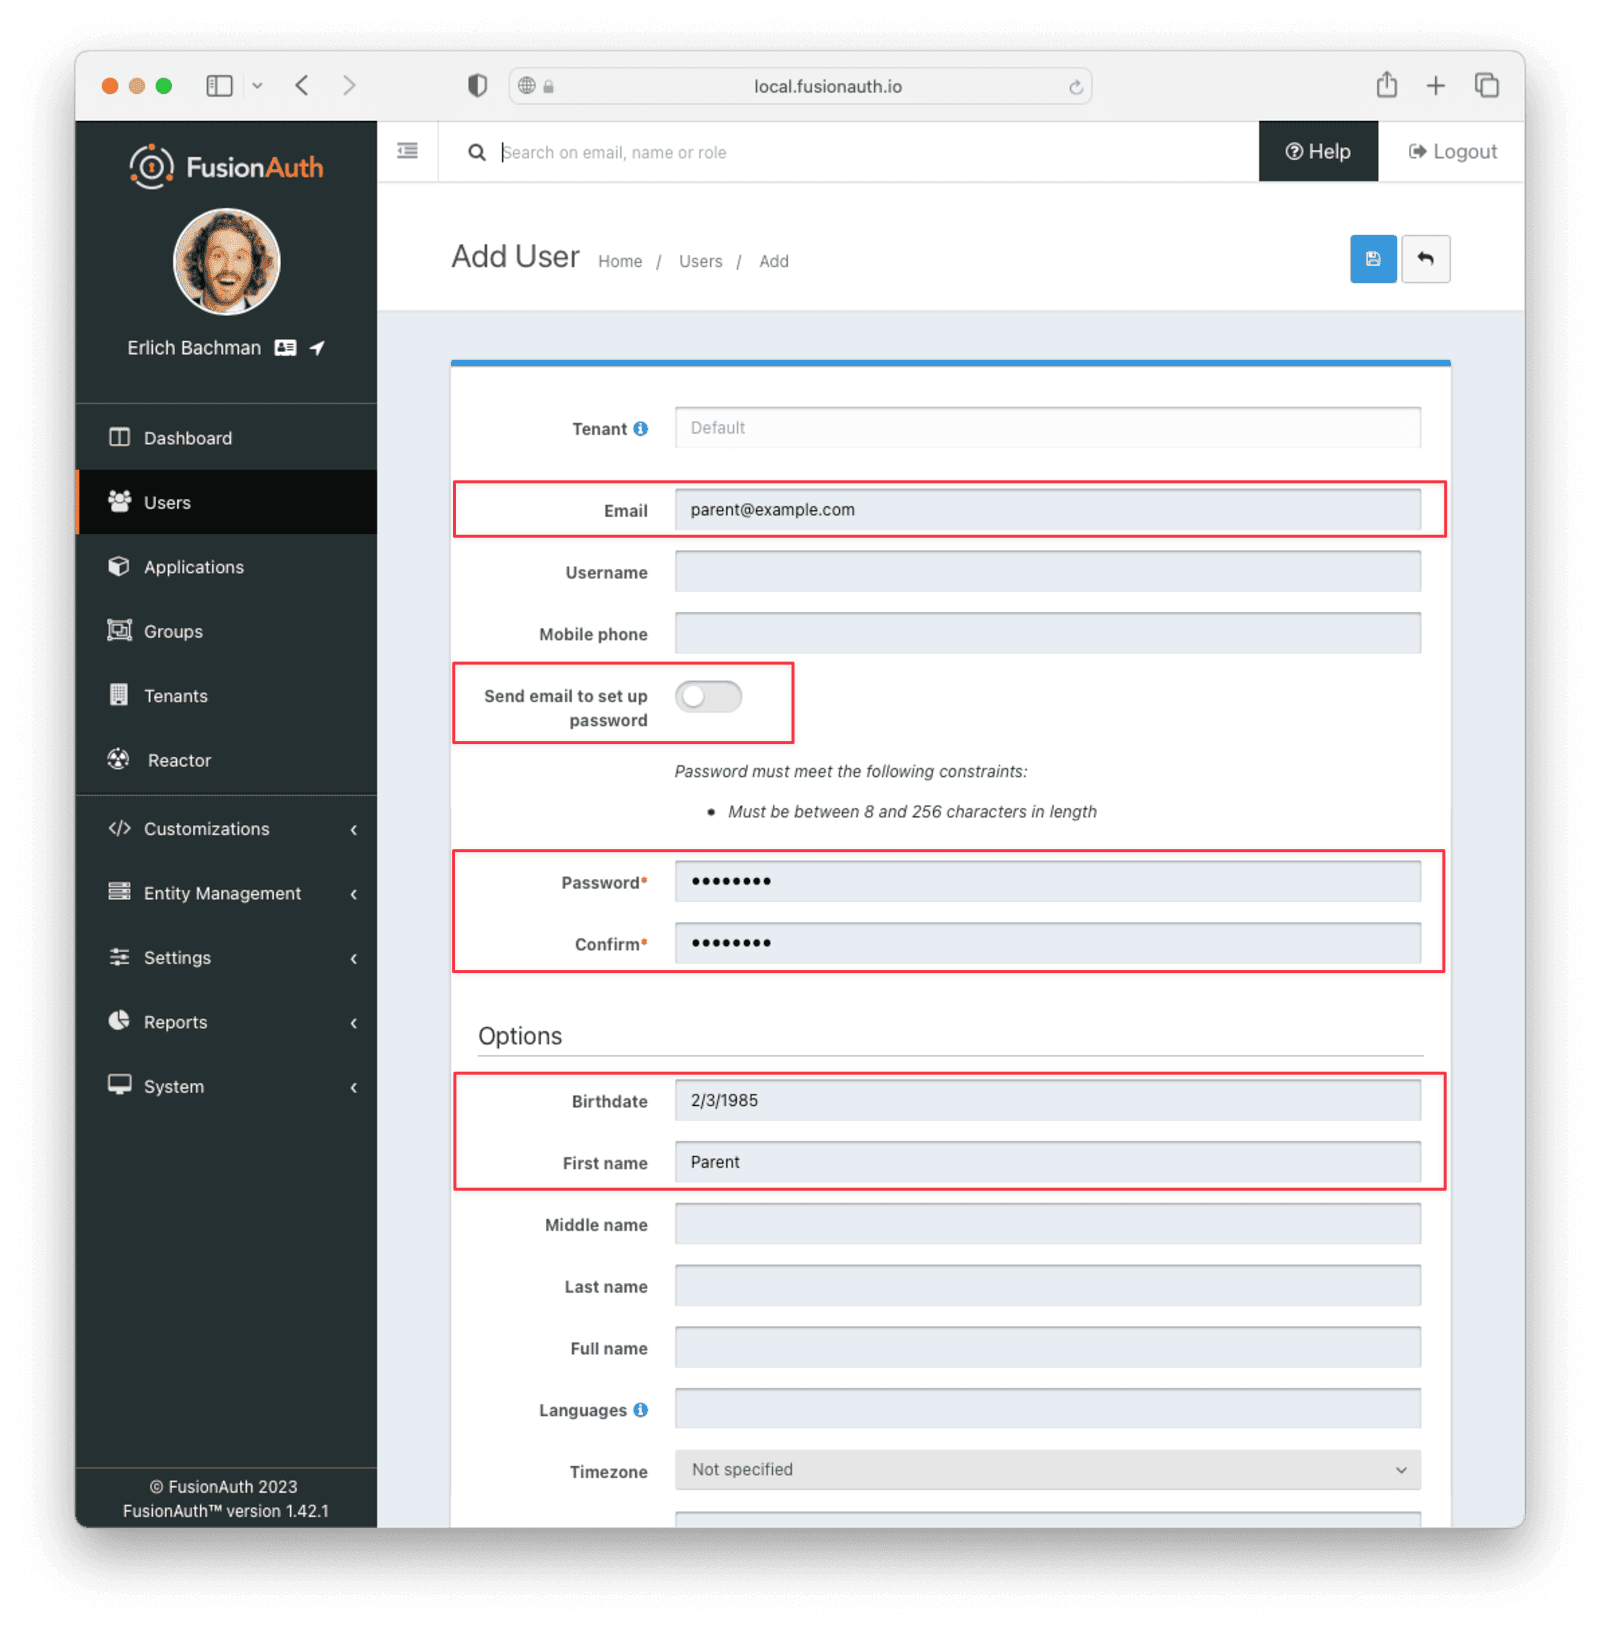
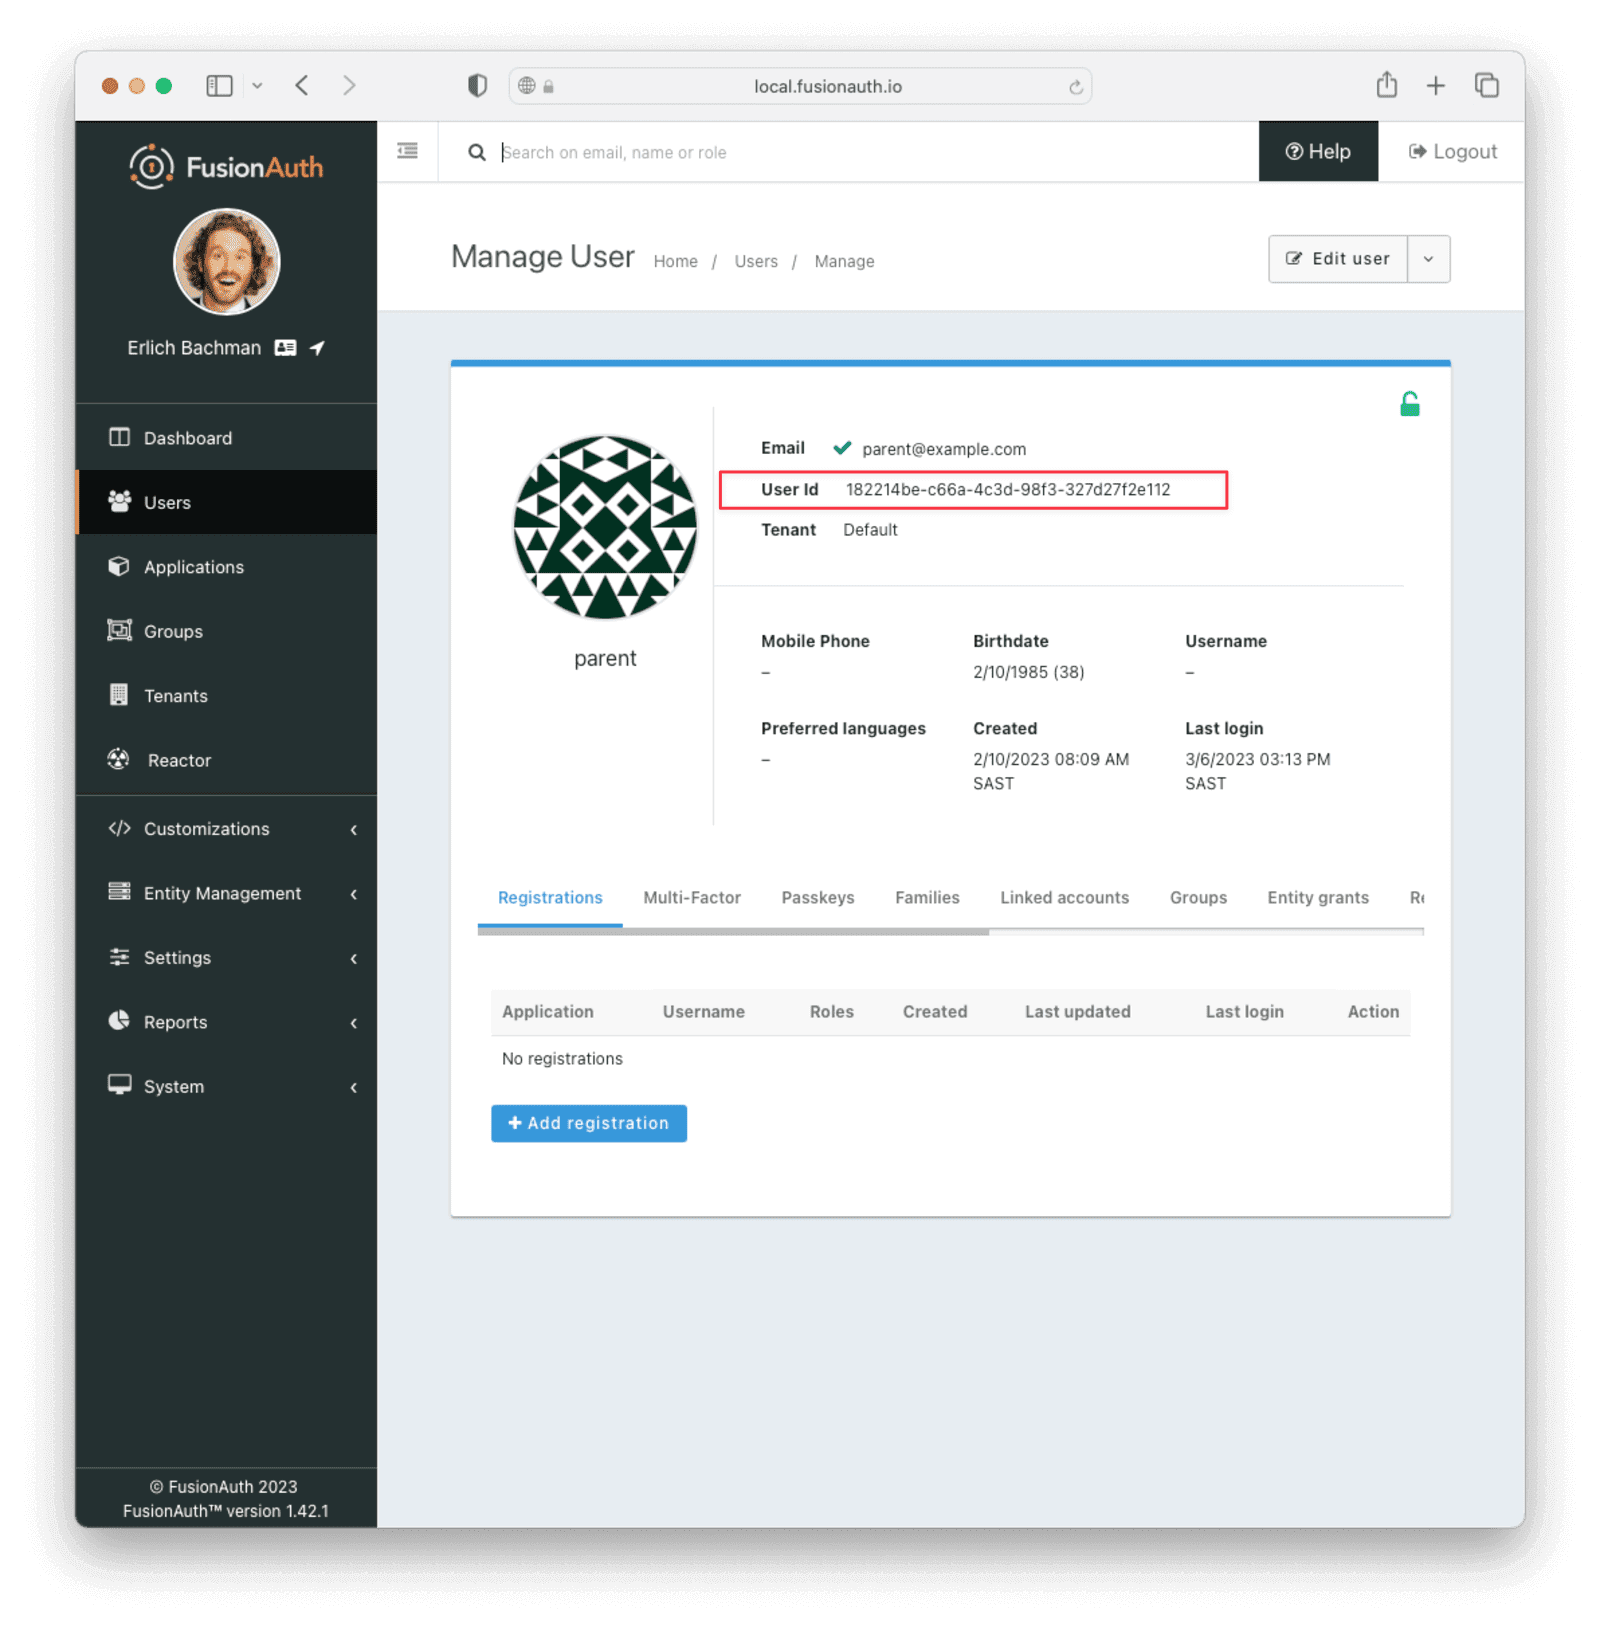
Let’s create the parent user first. Navigate to “Users” and click the “Add” button. Supply an email address. Toggle the “Send email to set up password” switch to directly supply a password. For display purposes, provide a “First Name”. A user must be at least 21 years old to be designated as a family owner, so supply an appropriate “Birthdate” as well. This requirement can be modified in the tenant configuration.
Repeat this process for the child user. The child user’s “Birthdate” can be anything or left to the default blank. Record the “User Id” of both users, as you will need them when adding the users to a family.
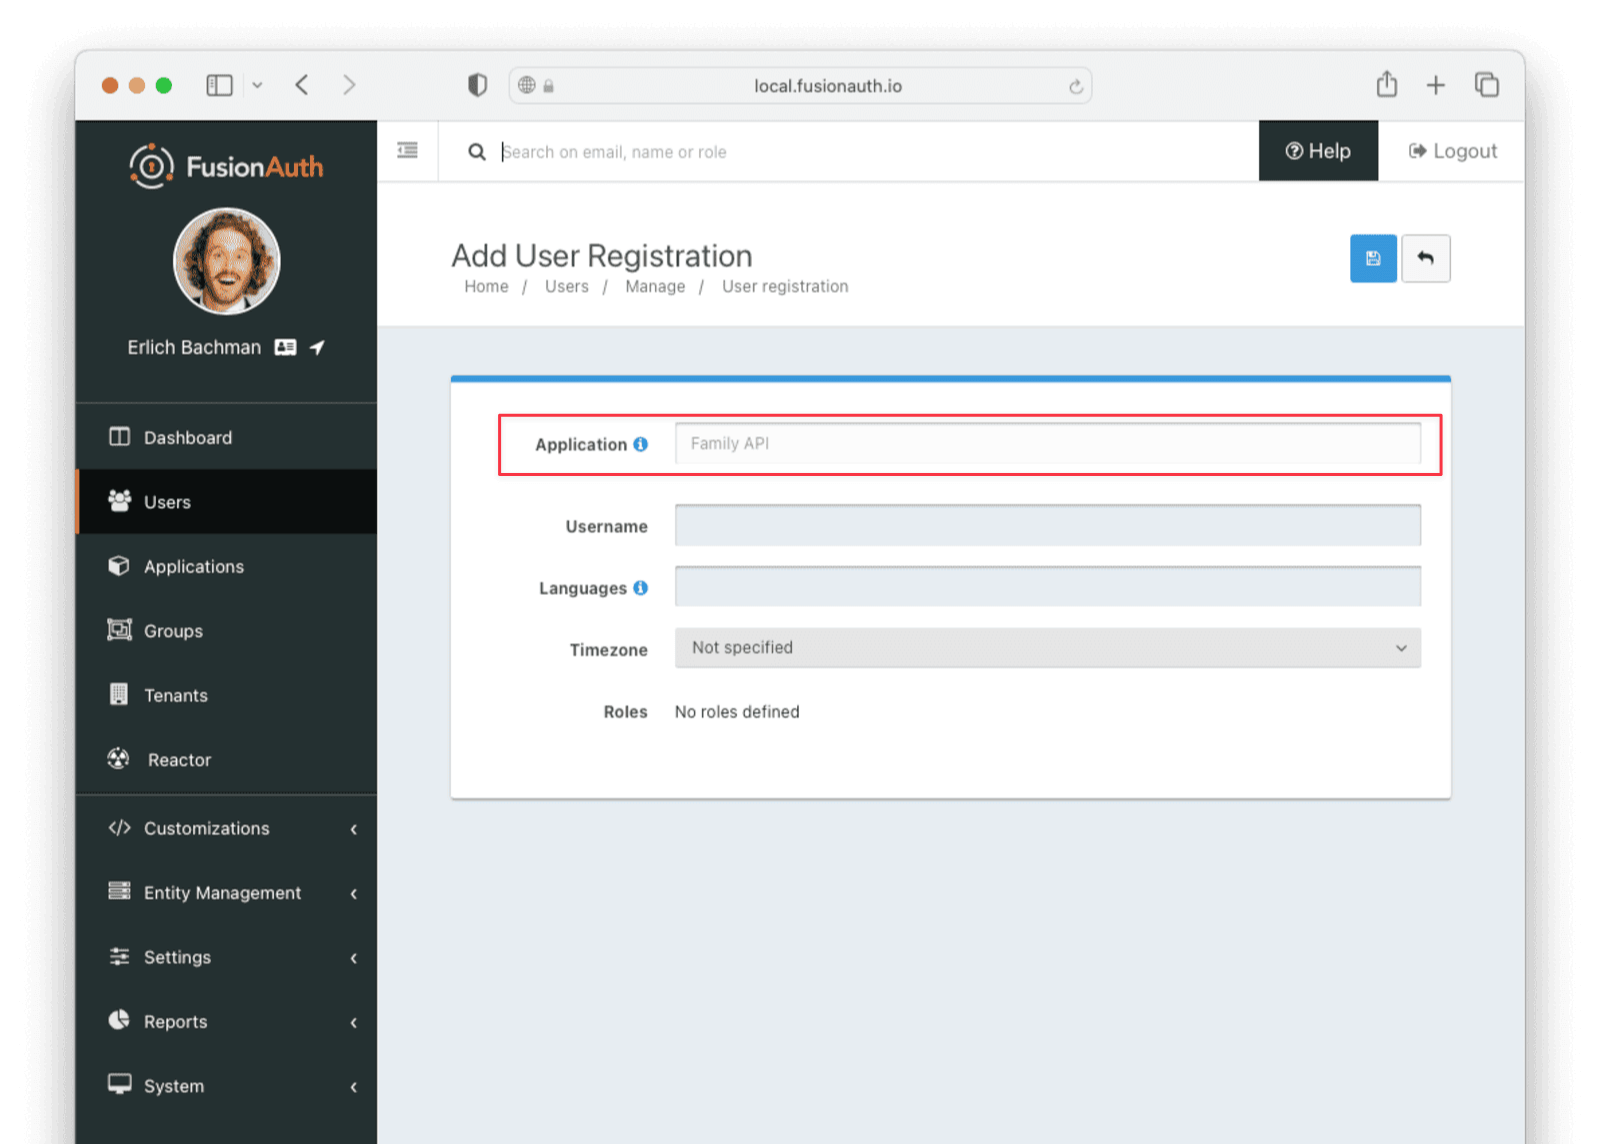
Then, register both users to the application. Click the “Manage” button for each user and then click the “Add registration” button. Select the application from the dropdown. You can leave out the other information.
Adding users to a family
Now that you’ve created your two users and registered them to your application, you can assign both users to their appropriate family roles via the Family API. Execute the following command in your terminal.
curl -X POST <YOUR_FUSIONAUTH_URL>/api/user/family \ -H "Authorization: <YOUR_API_KEY>" \ -H "Content-Type: application/json" \ -d '{ "familyMember" : { "userId": "<PARENT_USER_ID>", "owner": true, "role": "Adult" } }'
Here, <YOUR_FUSIONAUTH_URL> is your fully-qualified domain name, including the protocol, for example, https://local.fusionauth.io. <YOUR_API_KEY> is the key that you created in the “Setting up a FusionAuth API key” section, and <PARENT_USER_ID> is the “User Id” of the parent user that you created earlier. Record the Id value in the response JSON that is returned upon executing the request. This is the Id of the newly created family in FusionAuth. You will need the Id to add the child user to this family.
The request to add the child user to the family is similar but has a few key differences. First, since the family already exists, you will use a PUT request rather than a POST request. Second, you need to supply the unique Id for the family <YOUR_FAMILY_ID> in the request’s URL and you also need to supply the child <CHILD_USER_ID> which is the “User Id” of the child created earlier. Finally, the owner and role values will be different.
Execute the following command in your terminal.
curl -X PUT <YOUR_FUSIONAUTH_URL>/api/user/family/<YOUR_FAMILY_ID> \ -H "Authorization: <YOUR_API_KEY>" \ -H "Content-Type: application/json" \ -d '{ "familyMember" : { "userId": "<CHILD_USER_ID>", "owner": false, "role": "Child" } }'
Creating a consent
You are almost ready to build your custom application and leverage your FusionAuth configuration to enable permission-based access to your site. Now, you just have to add a consent, which will enable the parent user to grant or revoke access to the child user.
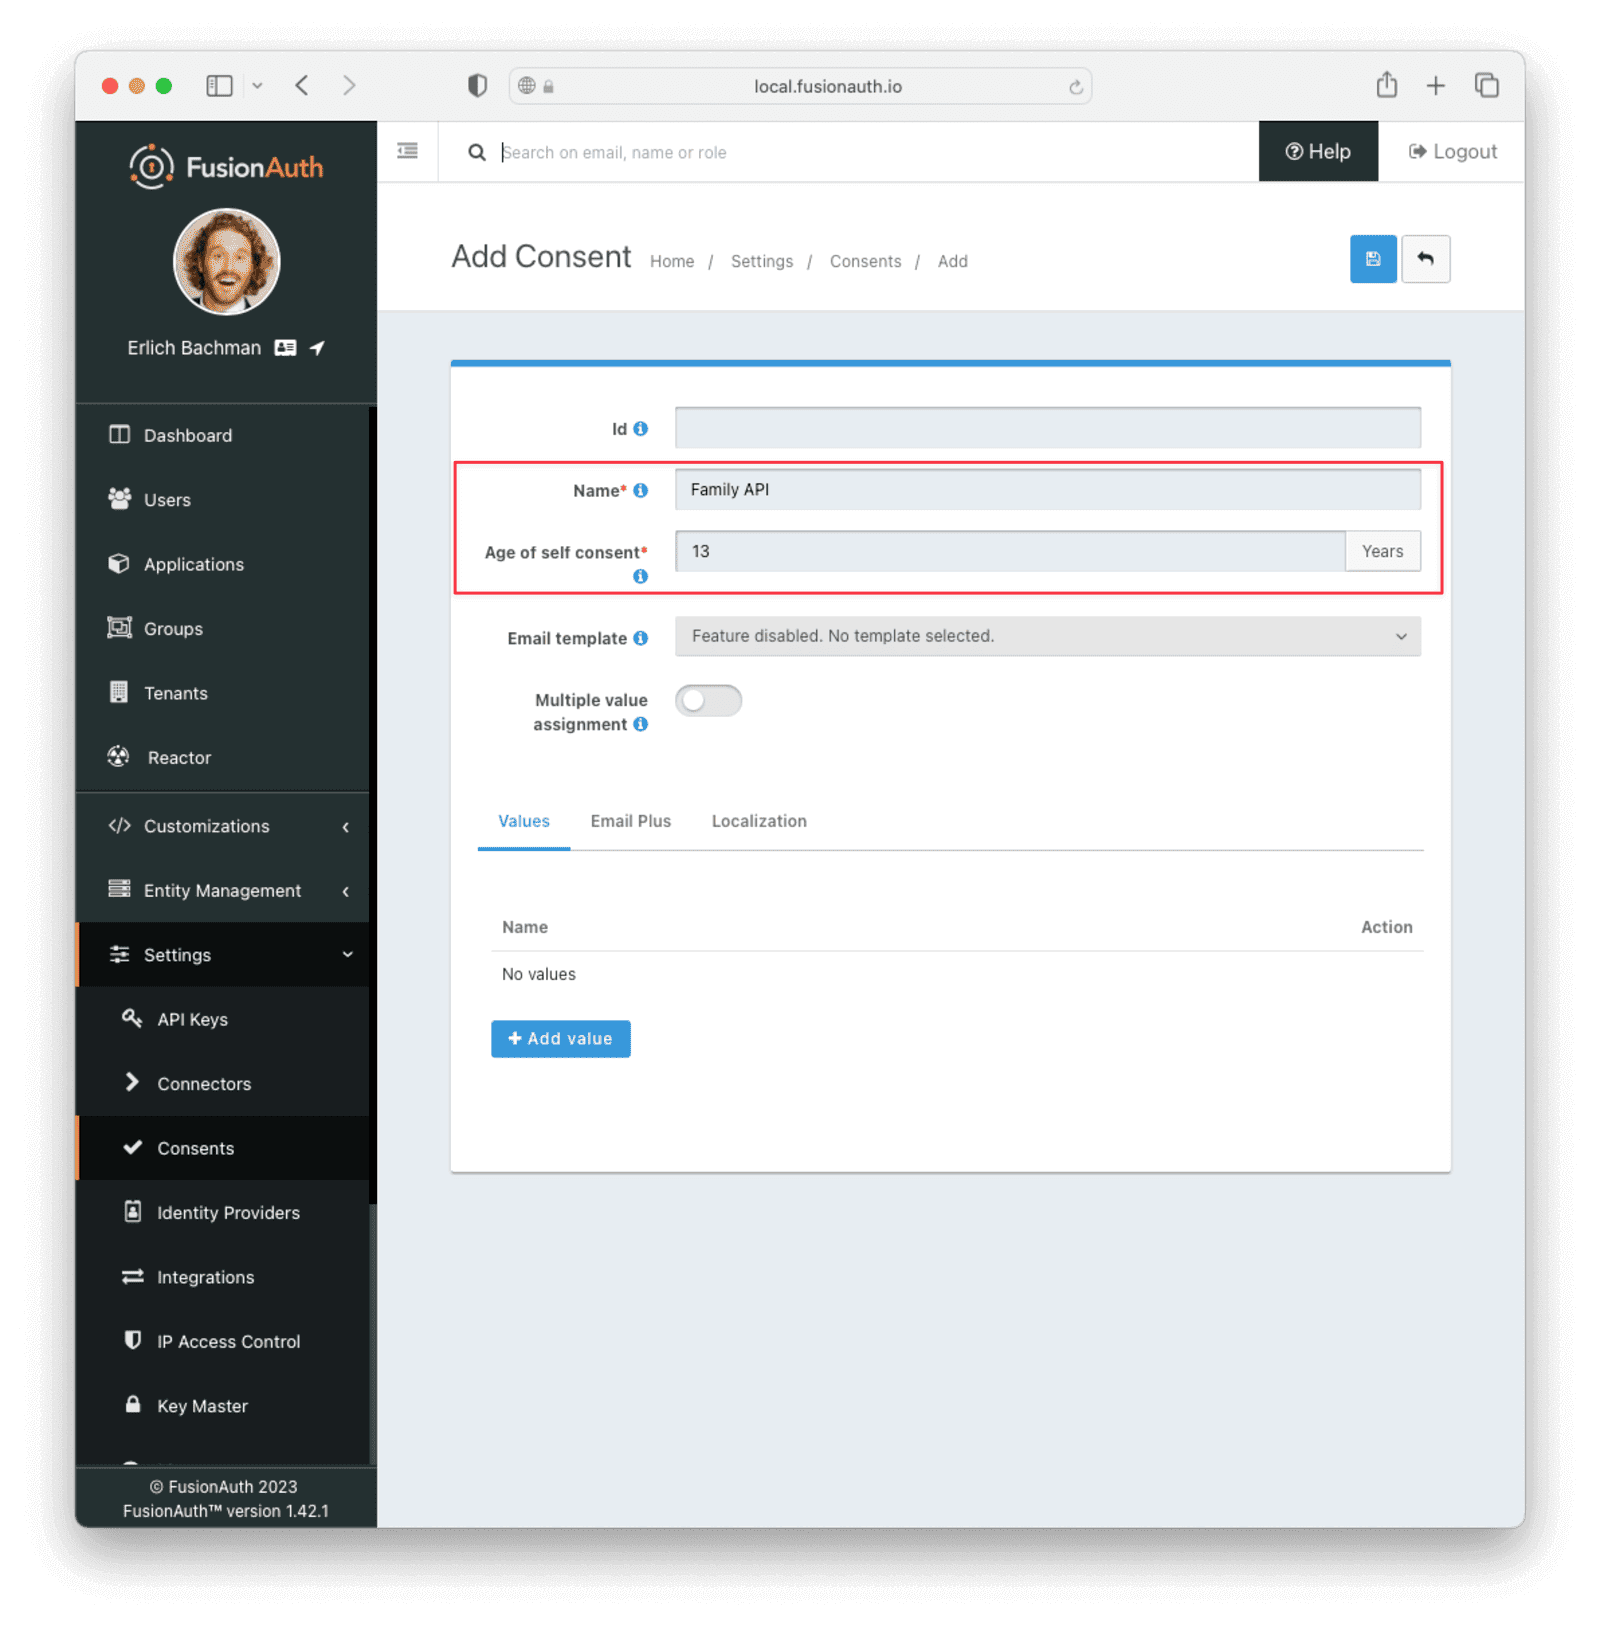
Navigate to “Settings” then “Consents” and click the “Add” button. Supply a “Name” for the consent. By default, the minimum age of self-consent is 13, meaning any user aged 13 or older can grant themselves the consent without needing permission from an adult user. You can modify this value if you wish. For the purposes of this guide, just make sure this number is higher than the age of your child user. If you did not supply a “Birthdate” for your child user, you can leave this value as-is, since a blank “Birthdate” will cause a user’s age to be calculated as -1.
Setting up Express
Your FusionAuth configuration is now ready to go and you can start building the application using Express.
To get started, you should:
- Scaffold a new Express application.
- Install the scaffolded dependencies.
- Install the helper libraries and the FusionAuth Typescript client.
- Start the server to ensure everything is installed and working.
Here are the commands to perform the above steps:
npx express-generator --view=pug fusionauth-example-family cd fusionauth-example-family npm install npm install @fusionauth/typescript-client pkce-challenge@3 express-session npm start
If all went well, the server should start successfully and you can visit http://localhost:3000.
Building the application
The application will have only one page apart from the FusionAuth login page. This page will dynamically display a list of children if the current user is an adult user, and a restricted section if the current user is either an adult or a child who has been granted permission to view it by an adult user in their family. For each child, there is a button to either grant or revoke consent (and thus access) to the restricted section. It will also have a login link that will redirect the user to the FusionAuth login page if they are not authenticated.
For the landing page view, add the following to views/index.pug. Note that the page uses data from a view model, which you will populate in the home route later.
extends layout block content h1= title p Welcome to #{title} - var clientId = '779d01fb-94c1-4f8c-9c0f-6783aff44a34' if user p Hello #{user.firstName} if family - var self = family.filter(elem => elem.id == user.id)[0] - family = family.filter(elem => elem.id != user.id) if family.length > 0 && self.role == "Adult" p Confirmed children ul each child in family form(action='/change-consent-status', method='POST') p #{child.email} | Consent #{child.consentstatus} input(type='hidden', name='userConsentId', value=child.userConsentId) | if child.status == "Active" input(type='submit', value='Revoke Consent') input(type='hidden', name='desiredStatus', value='Revoked') input(type='hidden', name='userId', value=child.id) else input(type='hidden', name='desiredStatus', value='Active') input(type='submit', value='Grant Consent') input(type='hidden', name='userId', value=child.id) if self.role == "Adult" || self.status == "Active" h2 Restricted Section p This is a restricted section. Only adults and children granted consent by an adult can view it. else a(href='http://localhost:9011/oauth2/authorize?client_id='+clientId+'&response_type=code&redirect_uri=http%3A%2F%2Flocalhost%3A3000%2Foauth-redirect&scope=offline_access&code_challenge='+challenge+'&code_challenge_method=S256') Login
Replace clientId with the Id of your FusionAuth application and http://localhost:9011 with the fully qualified URL of your FusionAuth instance, including the protocol. For example, clientId might look like 7d31ada6-27b4-461e-bf8a-f642aacf5775 and your FusionAuth URL might look like https://local.fusionauth.io.
Replace the value after redirect_uri with the URL encoded redirect URL of your application, with /oauth-redirect appended. For example, if your application is running on http://localhost:3000, then the redirect URL should be http%3A%2F%2Flocalhost%3A3000%2Foauth-redirect.
You can use the express-session middleware package to facilitate the storage and usage of session information in your app. In particular, you’ll store the Proof Key for Code Exchange (PKCE) data needed to securely exchange FusionAuth-generated Authentication Codes for a JWT. In the app.js file, add the following line at the top:
var expressSession = require('express-session');
To use the package, add the following line under app.use(cookieParser());:
app.use(expressSession({resave: false, saveUninitialized: false, secret: 'fusionauth-node-example'}));
At this point, your application has a Login link that will redirect you to the FusionAuth login page, but it does not yet have the necessary callback route to complete the login. The page also references view models, which will be created next.
Creating Express Routes
There are three main routes needed:
- The home page route, which will also create and populate the view models referenced in the view created above.
- The OAuth callback route, which FusionAuth will call after a successful login.
- A route to update the consent of the chosen child.
Update the routes/index.js file to look like this:
var express = require('express'); var router = express.Router(); const pkceChallenge = require('pkce-challenge').default; const { FusionAuthClient } = require('@fusionauth/typescript-client'); const clientId = '779d01fb-94c1-4f8c-9c0f-6783aff44a34'; const clientSecret = 'fs9PIEj-Th-qiribC9H-x5Rnw1s3YnALnqSCXnGwdFQ'; const client = new FusionAuthClient('6iIiGfOSMgzpQusy5M4MlM8iU04uuLqnbABwUE_HcAlBjf0IP4k9Pxv4', 'http://localhost:9011'); const consentId = '512603b1-89ed-4027-9e69-40fc275fcfd8'; async function getUserProfiles(familyUsers) { const getUsers = familyUsers.map(elem => client.retrieveUser(elem.userId)); const profiles = await Promise.all(getUsers); return profiles; } async function getUserConsentStatuses(users) { const getUserConsentStatuses = users.map(elem => client.retrieveUserConsents(elem.userId)); const consentsResponseArray = await Promise.all(getUserConsentStatuses); return consentsResponseArray; } function buildFamilyArray(users) { const family = []; users.forEach(user => { family.push({ "id": user.response.user.id, "email": user.response.user.email, "role": user.response.user.role }); }); return family; } function updateFamilyWithConsentStatus(family, consentsResponseArray) { const userIdToStatus = {}; const userIdToUserConsentId = {}; consentsResponseArray.forEach((consent) => { const matchingConsent = consent.response.userConsents.filter((userConsent) => userConsent.consent.id === consentId)[0]; if (matchingConsent) { const userId = matchingConsent.userId; userIdToUserConsentId[userId] = matchingConsent.id; userIdToStatus[userId] = matchingConsent.status; } }); return family.map((member) => { member["status"] = userIdToStatus[member.id]; member["userConsentId"] = userIdToUserConsentId[member.id]; return member; }); } /* GET home page. */ router.get('/', async function (req, res, next) { try { let familyProfiles = []; const pkce_pair = pkceChallenge(); req.session.verifier = pkce_pair['code_verifier']; req.session.challenge = pkce_pair['code_challenge']; if (req.session.user && req.session.user.id) { const response = await client.retrieveFamilies(req.session.user.id); if (response.response.families && response.response.families.length >= 1) { let familyMembers = response.response.families[0].members.filter(elem => elem.role !== 'Adult' || elem.userId === req.session.user.id); const userProfiles = await getUserProfiles(familyMembers); userProfiles.forEach(user => { let self = familyMembers.filter(elem => elem.userId === user.response.user.id)[0]; user.response.user.role = self.role; }); familyProfiles = buildFamilyArray(userProfiles); const consentsResponseArray = await getUserConsentStatuses(familyMembers); familyProfiles = updateFamilyWithConsentStatus(familyProfiles, consentsResponseArray); } } res.render('index', { family: familyProfiles, user: req.session.user, title: 'Family Example', challenge: pkce_pair['code_challenge'] }); } catch (error) { console.error("in error"); console.error(JSON.stringify(error)); next(error); } }); router.get('/oauth-redirect', async function (req, res, next) { try { const response = await client.exchangeOAuthCodeForAccessTokenUsingPKCE( req.query.code, clientId, clientSecret, 'http://localhost:3000/oauth-redirect', req.session.verifier ); req.session.state = req.query.state; const userResponse = await client.retrieveUserUsingJWT( response.response.access_token ); req.session.user = userResponse.response.user; res.redirect(302, '/'); } catch (err) { console.log('in error'); console.error(JSON.stringify(err)); } }); /* Change consent */ /* Change consent */ router.post('/change-consent-status', async function (req, res, next) { if (!req.session.user) { // force signin res.redirect(302, '/'); } let desiredStatus = req.body.desiredStatus; if (desiredStatus !== 'Active') { desiredStatus = 'Revoked'; } try { // check current user is an adult and that the child is part of their family. const response = await client.retrieveFamilies(req.session.user.id); if (response.response.families && response.response.families.length >= 1) { let self = response.response.families[0].members.filter(elem => elem.userId === req.session.user.id)[0]; if (self.role !== 'Adult') { return res.status(403).send('Only Adult users can change consents'); } if (response.response.families[0].members.filter(elem => elem.userId === req.body.userId).length < 1) { return res.status(403).send('You cannot access families you are not part of'); } } // Now get the UserConsent for the child, or create one if one hasn't been granted yet: const consentsResponse = await client.retrieveUserConsents(req.body.userId); let userConsent = consentsResponse.response.userConsents.filter((userConsent) => userConsent.consent.id === consentId)[0]; if (!userConsent) { // The child does not yet have a consent. Create a consent for this child. const createConsent = await client.createUserConsent(null, { userConsent: { consentId: consentId, giverUserId: req.session.user.id, status: "Active", userId: req.body.userId } }); userConsent = createConsent.response.userConsent; } const patchBody = { userConsent: { status: desiredStatus } }; await client.patchUserConsent(userConsent.id, patchBody); res.redirect(302, '/'); } catch (err) { console.log('in error'); console.error(JSON.stringify(err)); next(err); } }); module.exports = router;
Each route will be reviewed in more detail below.
Make sure to update the following at the top:
clientIdclientSecret- the parameters to
new FusionAuthClient(the first parameter is the API key, the second is ) consentId
The pkceChallenge package enables your application to use a Proof Key for Code Exchange (PKCE). PKCE is a security layer that sits on top of the Authorization Code grant to ensure that authorization codes can’t be stolen or reused. Here, you are also importing the FusionAuth Typescript client, as well as several parameters that allow your application to communicate with your FusionAuth configuration.
Find the values for clientId and clientSecret in FusionAuth under “Applications” then “Your Application”. In a production environment, you should use environment variables here to prevent your client secret from leaking. Find the API key under “Settings” then “API Keys” and the consentId under “Settings” then “Consents”.
The OAuth Callback Route
After authentication, FusionAuth will redirect to the callback route you provided in the login link to FusionAuth, as well as in the authorized callback route set in the FusionAuth application earlier. You can see the route above.
This route exchanges the Authentication Code returned from FusionAuth and the PKCE verifier code for a JWT, which is used to get the user profile of the authenticated user. The user profile is then added to the session and the client is redirected to the home page.
The Home Route
The home route above has a bit of logic needed. Essentially, the logic required is:
- Get the family of the logged-in user.
- Find all the child members of the family.
- Get the family role of the logged-in user.
- Get all the
UserConsentsof the family members. - Join the
UserConsentswith the profiles. - Display the child profiles with their associated consents.
Since this is a lot of logic and API calls, the route will call out to helper functions to gather all the information.
The familyMembers array is a filtered version of the entire family that only contains children and the currently logged-in adult. In other words, any other adults from the family are removed, as you won’t need to set consents for them, but you do want to keep the family role information for the currently logged-in adult. Note that, when building the familyMembers array, the filter criterion is !== 'Adult', not === 'Child' as you might expect. This is because FusionAuth also allows users to be designated as Teen to allow for further granularity when assigning roles in a family.
The above code makes use of several named functions. The first function is getUserProfiles(), which gathers all user profiles in the family. This is needed because the Family API call only returns a subset of each family member’s information. You need to get members’ usernames or emails too, which are available through the client.retrieveUser function.
async function getUserProfiles(familyUsers) { const getUsers = familyUsers.map(elem => client.retrieveUser(elem.userId)); const profiles = await Promise.all(getUsers); return profiles; }
Next is getUserConsentStatuses(), which gathers information about each user’s consent permissions.
async function getUserConsentStatuses(users) { const getUserConsentStatuses = users.map(elem => client.retrieveUserConsents(elem.userId)); const consentsResponseArray = await Promise.all(getUserConsentStatuses); return consentsResponseArray; }
Each of the above two functions asynchronously processes the familyMembers array into new objects that contain key information. Here’s the functions that make use of those objects.
First is buildFamilyArray(), which filters key information from the object returned from getUserProfiles to build a view model to display.
function buildFamilyArray(users) { const family = []; users.forEach(user => { family.push({"id": user.response.user.id, "email": user.response.user.email, "role": user.response.user.role}); }); return family; }
Next is updateFamilyWithConsentStatus(), which adds consent information to each element in the array returned from buildFamilyArray(). This data will then be pushed to the landing page, where the information appropriate for the current user can be dynamically displayed.
function updateFamilyWithConsentStatus(family, consentsResponseArray) { const userIdToStatus = {}; const userIdToUserConsentId = {}; consentsResponseArray.forEach((consent) => { const matchingConsent = consent.response.userConsents.filter((userConsent) => userConsent.consent.id == consentId)[0]; if (matchingConsent) { const userId = matchingConsent.userId; userIdToUserConsentId[userId] = matchingConsent.id; userIdToStatus[userId] = matchingConsent.status; } }); return family.map((member) => { member["status"] = userIdToStatus[member.id]; member["userConsentId"] = userIdToUserConsentId[member.id]; return member; }); }
The Change Consent Route
The last piece of the puzzle is to handle the granting and revocation of consent by the adult user for the child user to access the site. When the grant or revoke button is clicked next to the child’s name, the following route is called. The payload is set in the hidden input fields in the index.pug view created earlier. Let’s look at the route in more detail here:
/* Change consent */ router.post('/change-consent-status', async function (req, res, next) { if (!req.session.user) { // force signin res.redirect(302, '/'); } let desiredStatus = req.body.desiredStatus; if (desiredStatus !== 'Active') { desiredStatus = 'Revoked'; } try { // Check current user is an adult and that the child is part of their family. const response = await client.retrieveFamilies(req.session.user.id); if (response.response.families && response.response.families.length >= 1) { let self = response.response.families[0].members.filter(elem => elem.userId === req.session.user.id)[0]; if (self.role !== 'Adult') { return res.status(403).send('Only Adult users can change consents'); } if (response.response.families[0].members.filter(elem => elem.userId === req.body.userId).length < 1) { return res.status(403).send('You cannot access families you are not part of'); } } // Now get the UserConsent for the child or create one if one hasn't been granted yet. const consentsResponse = await client.retrieveUserConsents(req.body.userId); let userConsent = consentsResponse.response.userConsents.filter((userConsent) => userConsent.consent.id === consentId)[0]; if (!userConsent) { // The child does not yet have a consent. Create a consent for this child. const createConsent = await client.createUserConsent(null, { userConsent: { consentId: consentId, giverUserId: req.session.user.id, status: "Active", userId: req.body.userId } }); userConsent = createConsent.response.userConsent; } const patchBody = { userConsent: { status: desiredStatus } }; await client.patchUserConsent(userConsent.id, patchBody); res.redirect(302, '/'); } catch (err) { console.log('in error'); console.error(JSON.stringify(err)); next(err); } });
The route performs quite a few tasks:
- Checks if there is a logged-in user. If not, the user is redirected to the login page.
- Checks if the logged-in user is an adult in a family.
- Checks if the logged-in user and the child user to grant or revoke the consent to is in the same family.
- Checks if there is already a
UserConsentadded for the child. If not, a newUserConsentis created and assigned to the child using theconsentIdfrom the consent created in the FusionAuth admin portal earlier. - Updates the
UserConsentto the desired status.
Testing
The coding is now complete. Type npm start at the console to start up the server, then navigate to http://localhost:3000 in a private window. This ensures that your main admin login to FusionAuth is not a confounding factor while logging in.
You should see the landing page looking something like this:
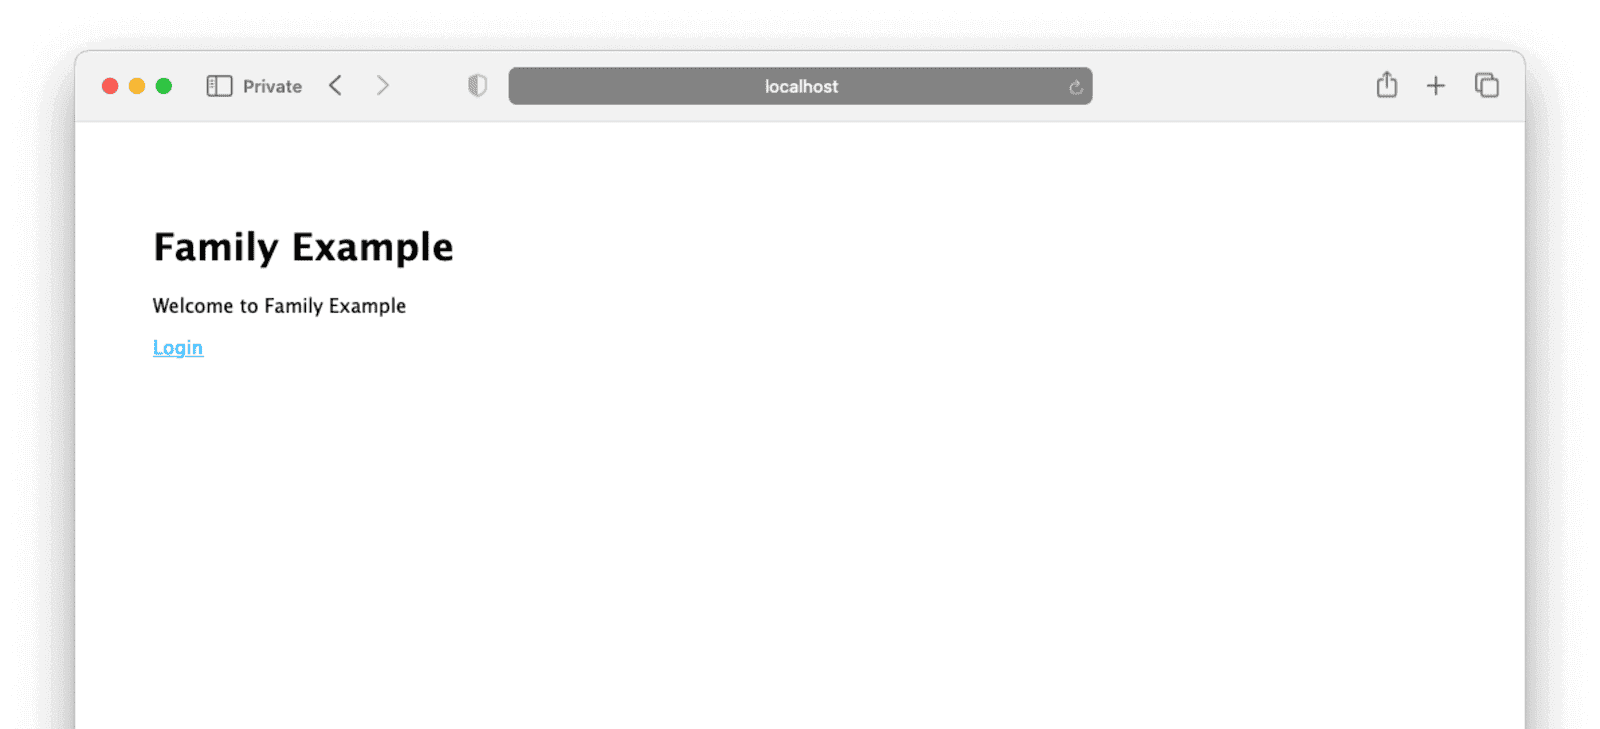
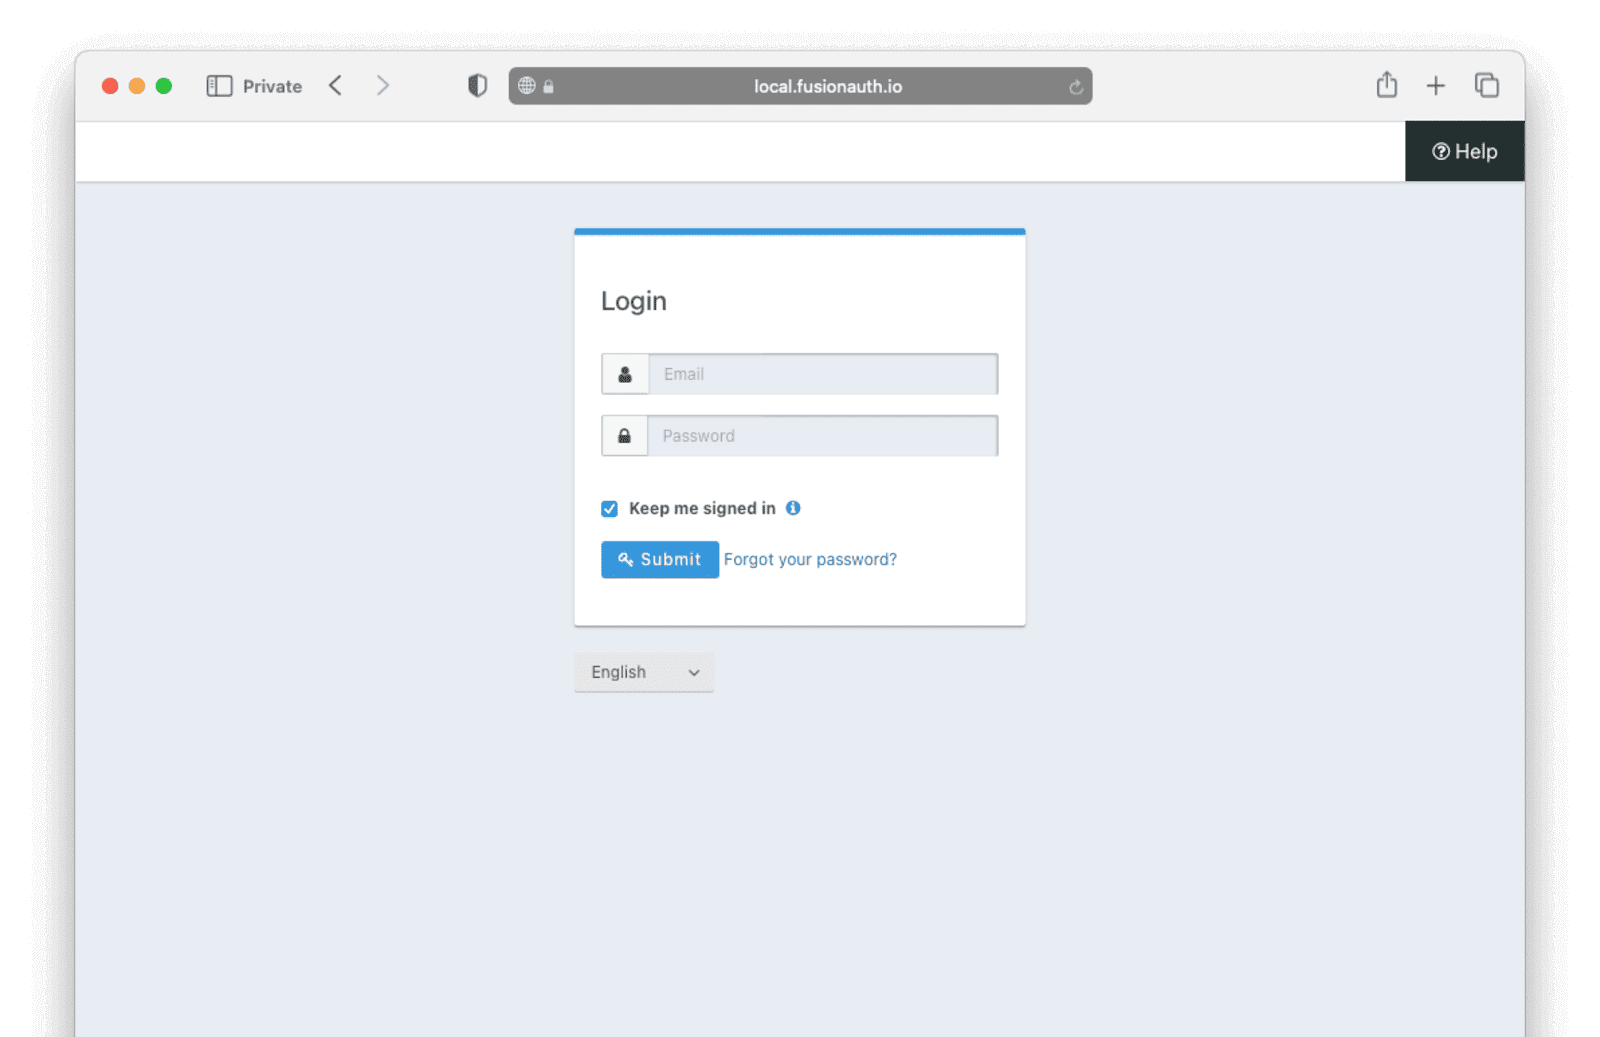
Clicking on “Login” should redirect you to your FusionAuth installation.
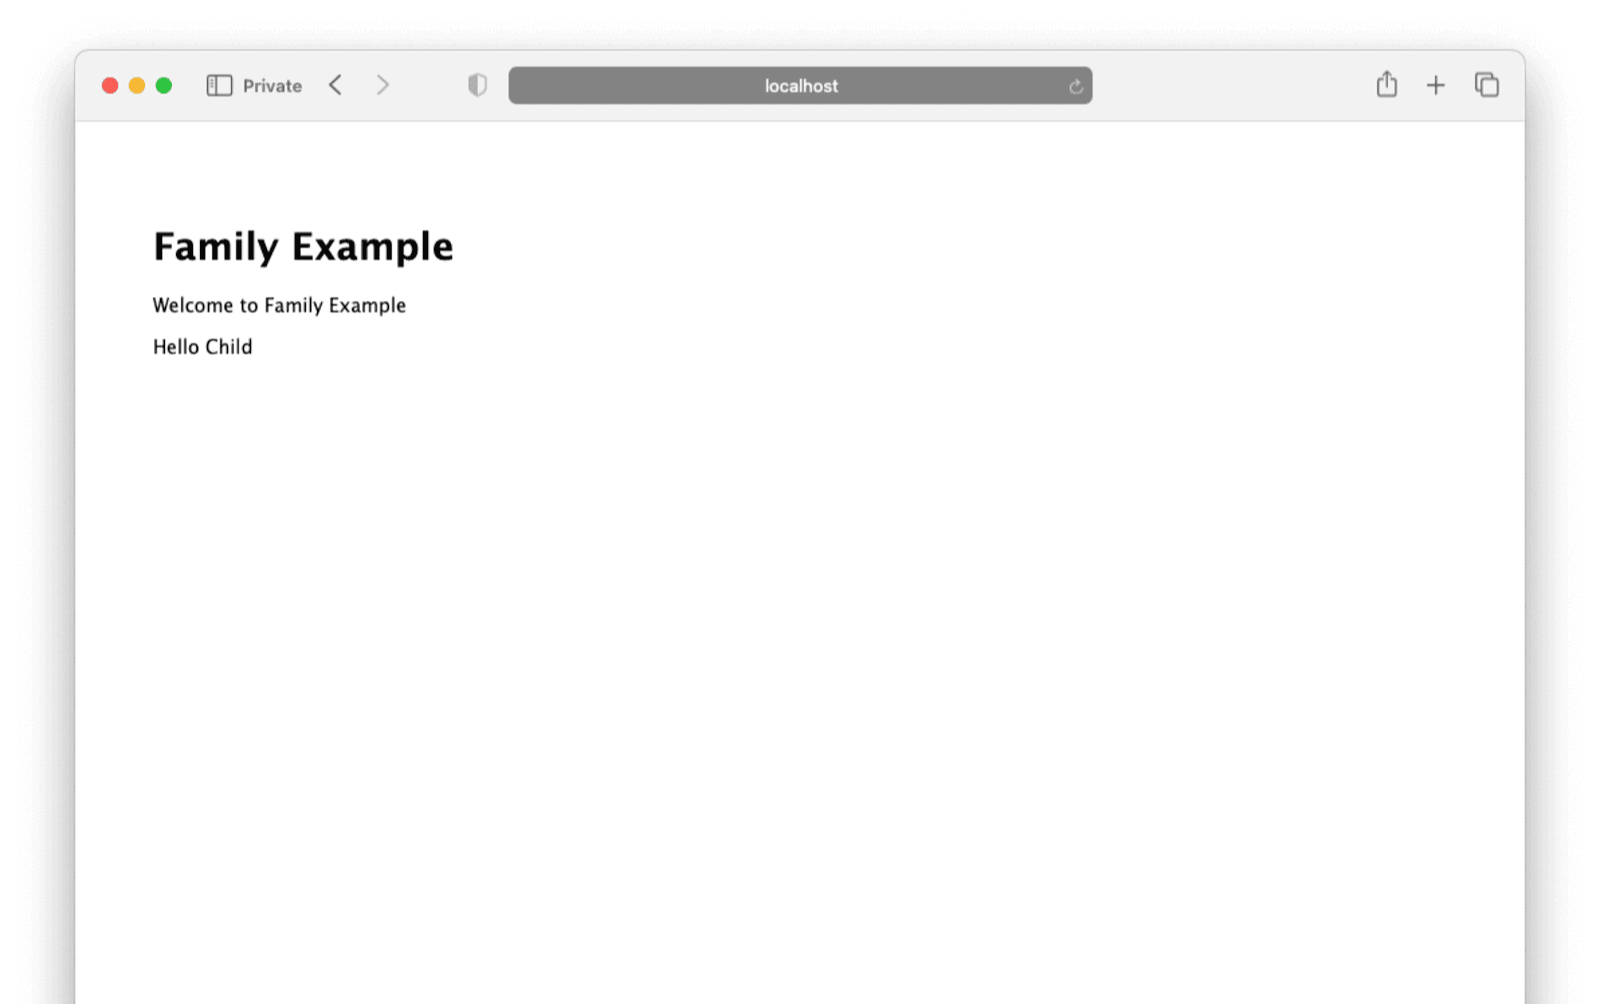
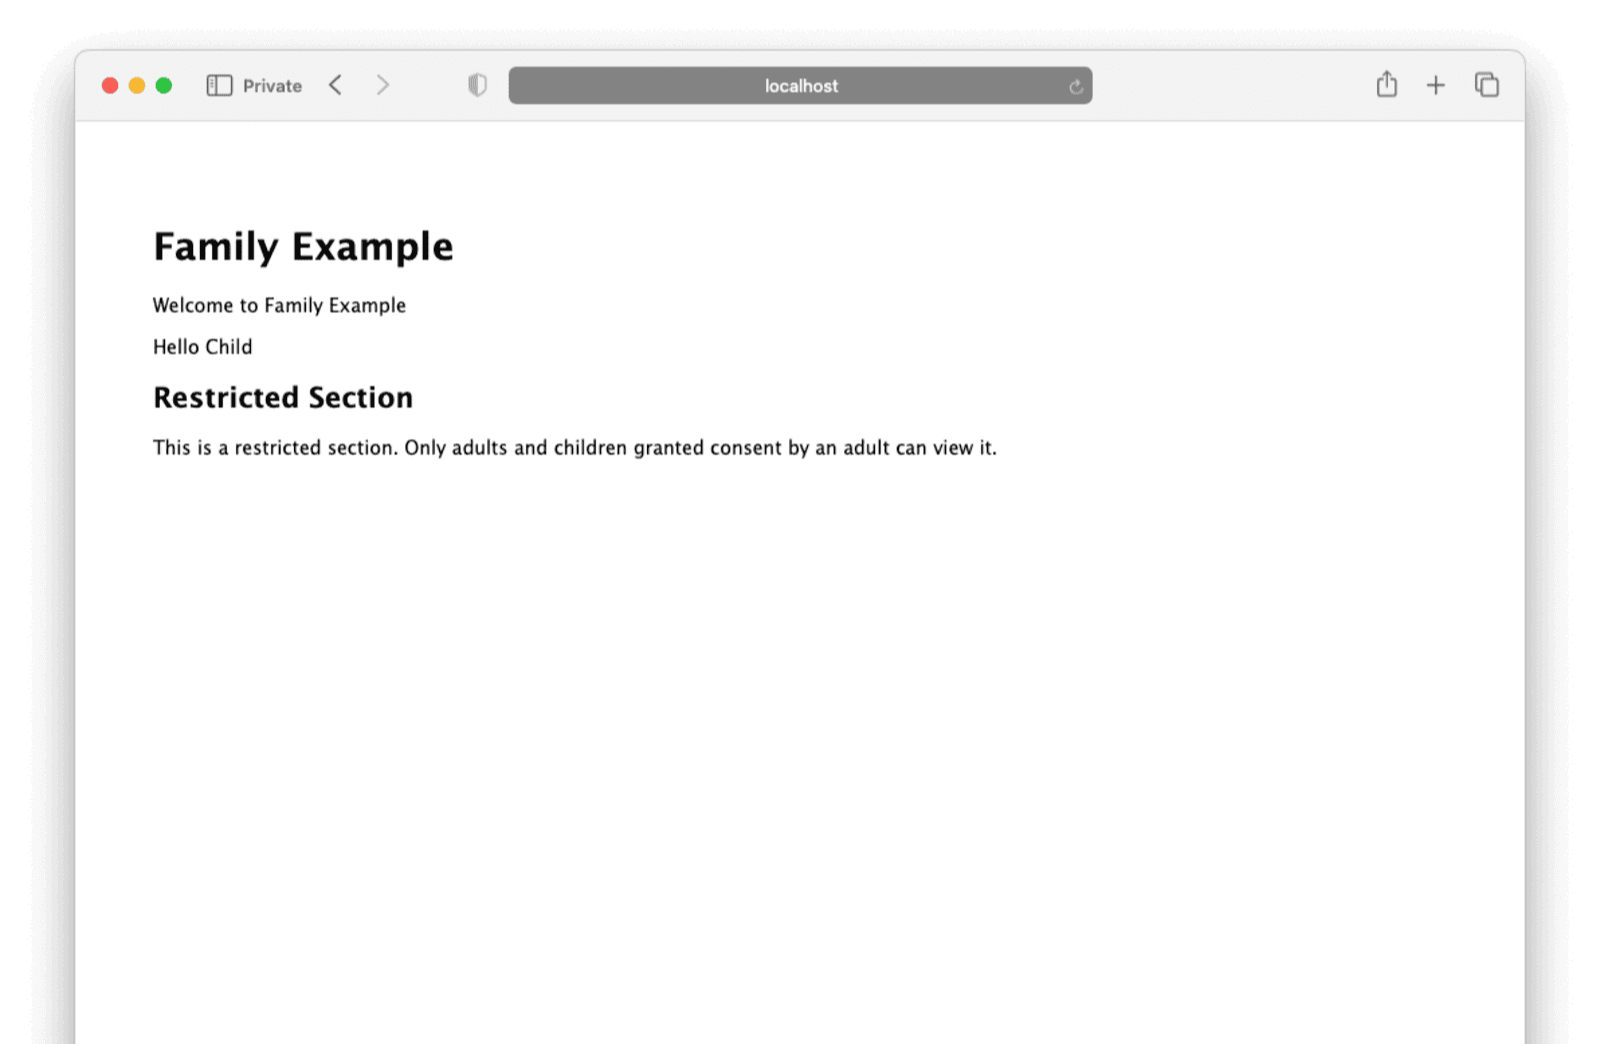
First, log in as the child user. You should see a very simple home page with no restricted information.
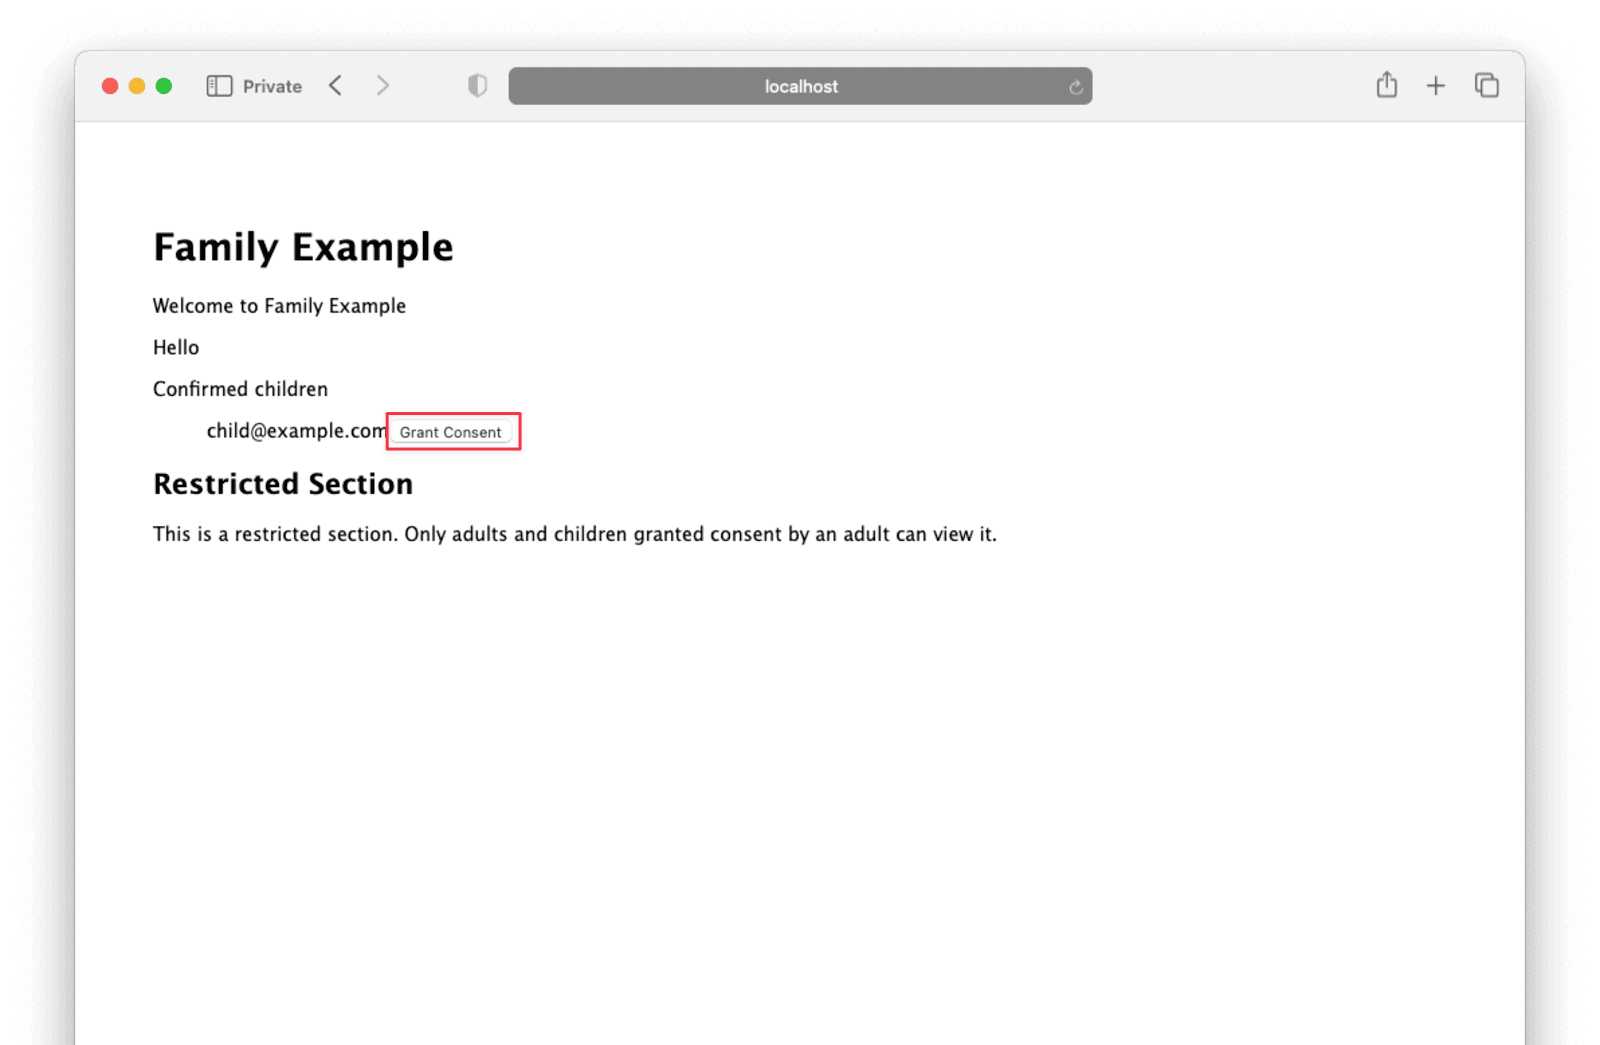
Close the private window and open a new one. Repeat the steps above, this time signing in as the parent user. You should see an option to grant the child user consent to view the restricted section.
Close the private window and open a new one. Log in as the child user again. This time, the restricted section should appear.
Where to next with Family API and Consents?
That’s the basics of this Express Family API example app. The app has a fully featured authentication system with parental controls, without the hassle and possible risks of implementing all of that code yourself. The complete code is hosted on GitHub here.
Of course, you would need to add more interesting features to this app for it to be useful. But being able to take care of the authentication, parental controls, consents, and general security with just a little configuration code leaves a lot more time for your application’s more useful and critical features.
For a production environment, you would need to do a bit more work in making sure FusionAuth is secured. In this example, you used the default password provided with Docker for the database, left debug mode on, and ran FusionAuth locally, co-hosted with the Express application. For a safer setup, you would run FusionAuth on its own infrastructure, physically separate from the Express app, and take more care around production configuration and deployment. FusionAuth gives you all of the tools to do this easily.